


I thought now my ring is FINALLY finished, I would do a little ‘how a ring is made’ post.
Apologies in advance for any rambling and/or epic flashes 
Background
OH and I have been together since Dec ‘07. We had a little girl in August ‘11 after nearly 3 years of living together. She is an awesome pirate-obsessive, but that’s another story! We had been talking about getting married off and on for ages, and finally one day, OH asked me what diamond I would recommend for:
“My friend’s girlfriend who has really, really similar taste to you”
So I replied:
“How much do you want to spend? I’ll get some stones and we can pick one”
Ah, romance! If you haven’t already guessed, I’m a jeweller, hence the practical approach to this particular task! So I phoned my stone dealer, and ‘borrowed’ a few stones to bring home on the train - in my pocket. As you do.
After much ‘umming’ and ‘ah-ing’, we picked one - my fave cut, a cushion - and then I left it to OH to pay for it and I had to forget everything that had happened so far. Then, on my birthday in March this year, he proposed with a little box, with just the stone in 
Then on to the designing!
---
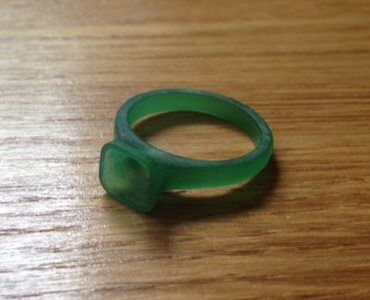
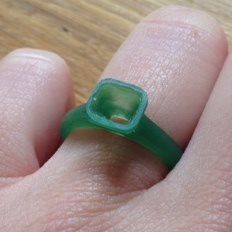
The idea
I knew I wanted something not completely traditional and that pink and grey diamonds also had to feature. After some doodling, I came up with this rough sketch of the ER and matching wedding band; the idea is different size pink and grey diamonds are scattered randomly on both the sides of the ER and in 2 areas on the wedding band, so it looks like a more unusual eternity band:

I then drafted in my friend who’s ER I had previously made to take up the design from there (it’s bad luck for me to make mine and I wanted her to help with the design anyway) who did some technical drawings - with a slight delay due to having her second baby in the middle of the process!
---
The initial model
Once we had her technical sketches that determined the scale of the ring and the style of setting, I took it to a goldsmith friend who carved the piece in wax. As it’s a bit of a chunky design and I wanted the setting and the shank to all be made from one piece, casting was the best option for me. It also meant that I could use 100% recycled platinum which I really wanted to do. So after some tweaking and reducing the weight of the wax wherever possible, we came up with the wax model that was ready to be sent for casting:
In the meantime, I borrowed a load of grey and pink diamonds of varying sizes to make the scatter design on the sides of the ring
The casting
Took about a week to arrive, and here is platinum in its raw, uncast form:
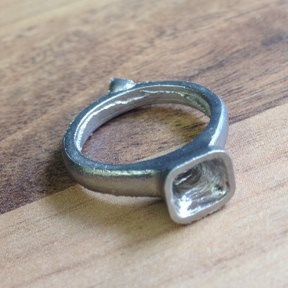
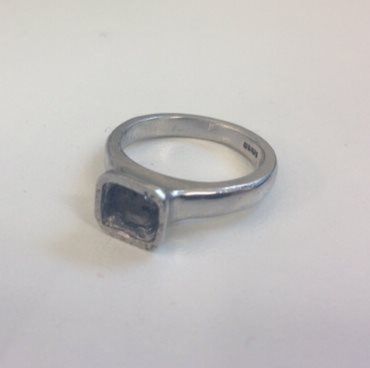
Which is a bit rough and needs a lot of cleaning up. So, back to the goldsmith to get the casting ready for hallmarking and setting. In order to hallmark something, the worst of the roughness needed to be taken off the inside of the ring as otherwise when you cleaned the piece up, you could clean out the hallmark. Hallmarking takes about a week or so. This is a rough clean up, with the stone balanced in, just before going for hallmarking:
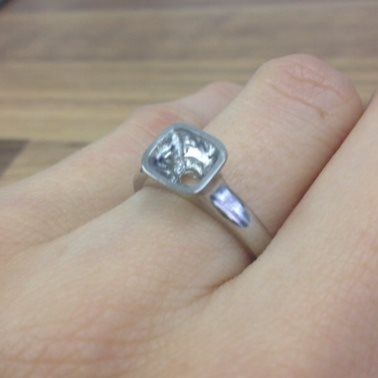
Once the piece was back from the Assay Office (hallmarking) and had a bit more of a clean up, it went to the setters for the ‘pre-setting’. This is where the setting for the main stone is prepared to fit the diamond, but the stone isn’t set. It’s not set so that it can go to the polishers and have the inside of the setting polished to help bounce light around inside the setting - this is only really done on full ‘rubover’ settings like mine, where no light can get in from anywhere.
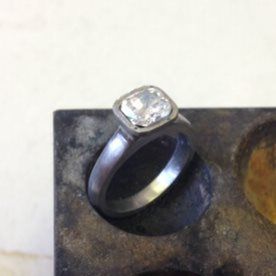
Before setting polish:
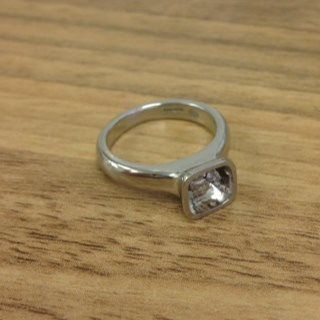
After:
Setting!
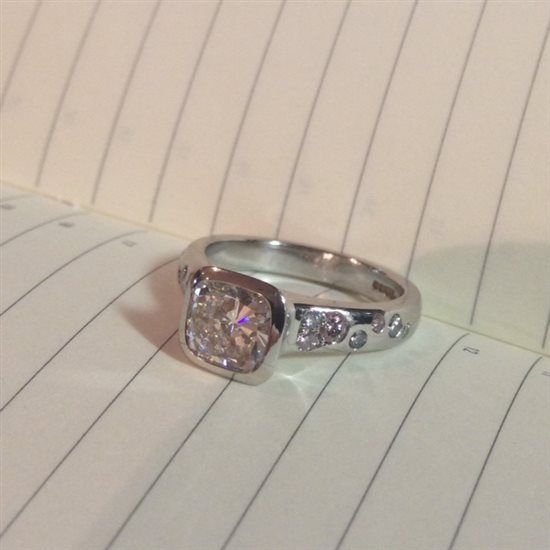
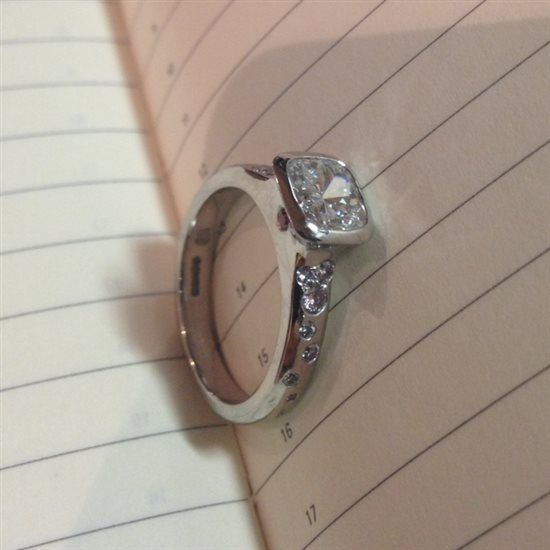
Next, the ring went back to the setter and the scatter design was laid out. This took me a couple of weeks to get right, and it still isn’t 100% because I need to get hold of some really small (under 1mm diameter) stones to help with the scattered effect.
But nevertheless, it was set today and I have FINALLY GOT IT ON MY HAND!
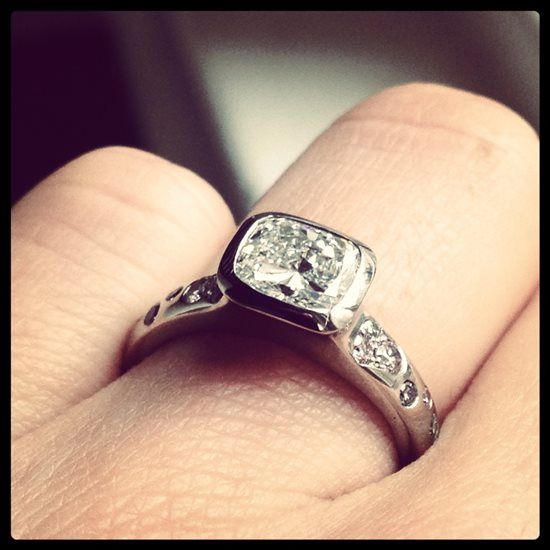
There are still a few stones missing, and it needs its final polish, but here it is! And I LOVE IT