


After shopping around the cheapest photobooth I could find was £289 for 3 hours and £75 an hour for any additional hours and I want it for day and night guests so the bill would of been phenomenal. So I decided to start making one!
The inner of the photobooth was a choice of iPad and a printer capable of AirPrint, or a DSLR, monitor, mini PC set up and printer.
For an easier life I chose the iPad mini with its FaceTime HD Front facing camera and various photobooth apps (including a wedding one for £6.99 on the App Store), an epson Xp-315 small in one wifi and AirPrint printer. So the photo can be taken and instantly shared online and printed via AirPrint and also saved onto the iPad all at the press of a button.
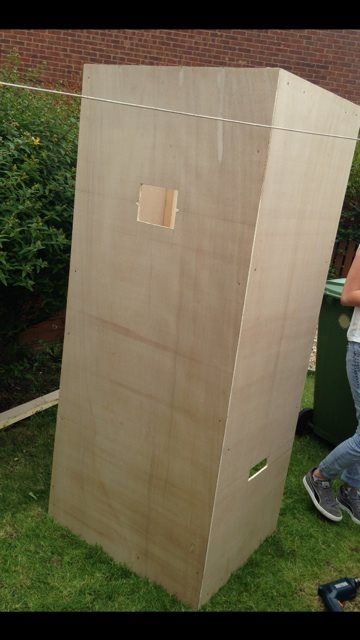
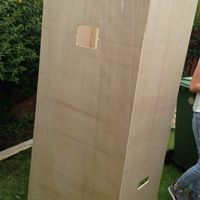
with the main parts bought I decided to start building the booth. I purchased some 9mm hardwood plywood and had some 4x2 timber left over from a job so I set too! I'll upload some pictures of what I've done so far below. I've decided to build it 1.8m tall, 800mm wide and 600mm deep for the main box.
So far I've only done the 2 sides and front as I need to install a case/cage to hold the iPad in place and a shelf for the printer so the back can't go on yet. Future plans include installing the case/cage, shelf for printer, steel tray on outside to collect printed photos, 4 way adaptor inside box to plug in iPad, printer etc, vintage curtain pole on right side (coming out of the box), curtain, spotlight type light for when photos are being taken, some mood/ambient lighting for when it's idle, paint it white and sand parts for a vintage look. P
Bearing in mind it still needs all that and a bottom and top putting on etc it's still in early days!
I'll keep this post updated and I'd be happy for any comments or suggestions!
Thank you!
Adam